
What graders actually look at — centering, corners, edges, and surface
The four things every grading service evaluates, how to inspect each one at home with a loupe and good light, and how to sort a submission stack so you're not paying grading fees on cards that can't hit the grade you need.
Grading fees are charged per card, and they're charged whether the card comes back a 10 or a 6. That flat structure is what makes pre-screening worth the ten minutes it takes: the cheapest grading mistake to fix is the one you never submit. A card with a soft corner or a dull edge doesn't become a 10 because you paid to have it looked at — it just becomes a paid confirmation of what a loupe would have told you for free.
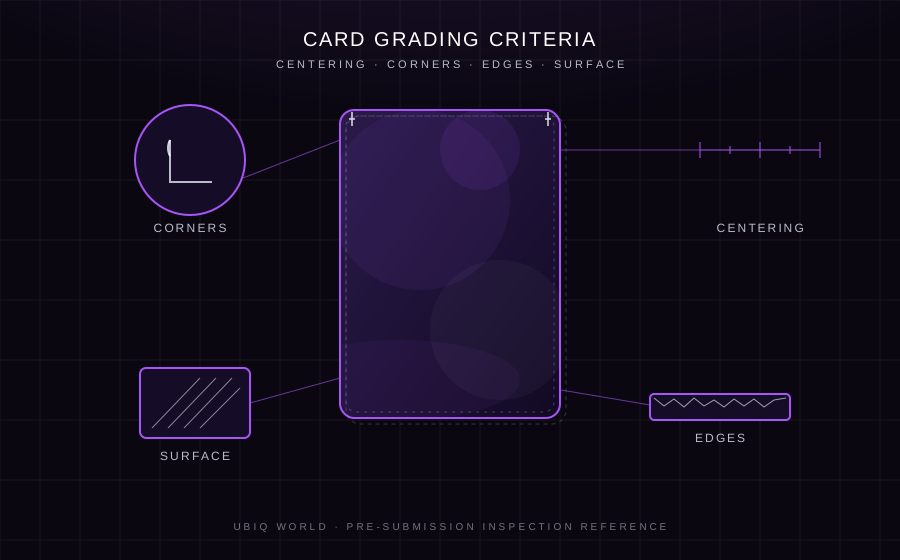
Every major grading service — PSA, BGS, CGC, and the rest — evaluates the same four physical characteristics, even though the exact language and numeric weighting differ between them: centering, corners, edges, and surface. Learn to check each one the way a grader does, and you can sort a submission stack into send, maybe, and keep-raw piles before a single card leaves your shop or your shipping envelope.
Centering
Centering measures how symmetrically the printed image sits inside the card's border, usually expressed as a ratio like left-to-right and top-to-bottom. It's often the first thing a grader checks because it's the most objective of the four criteria — a straight edge doesn't have an opinion.
To eyeball centering at home, lay the card on a flat, well-lit surface and rest a straight edge or a printed grid card along one border. Compare the width of the border on opposite sides: left versus right, then top versus bottom. A card that looks dead-centered from three feet away can reveal a visible lean the moment you actually measure it against a straight line instead of trusting your eye.
The mistake most people make is checking only the front. Back centering is graded too, and a card can have a clean front border with a noticeably off-center back — different print registration on the reverse is common enough that it's worth a second look on every card, not an occasional spot check. If you only flip the card once during your pre-screen, you're skipping half the measurement.
Corners
Corners take the first hit in almost every handling scenario — a card sliding out of a box, a thumb catching the tip while flipping through a stack, a binder page closing at the wrong angle. They're also the easiest defect to miss with the naked eye and the easiest to catch with a loupe.
Hold the card at an angle under bright light and look at each corner through a 10x loupe. You're checking for three distinct things:
- Whitening — the corner tip has worn through the top layer, showing a lighter color underneath.
- Softness — the corner has been compressed or rounded rather than staying sharp and square.
- Dings — small dents or creases right at the point of the corner.
Any one of these caps how high a corner-sensitive grade can go, regardless of how clean the rest of the card is. This is the practical argument for penny-sleeve-first handling: a card that goes straight into a penny sleeve the moment it's pulled, before it ever touches a binder page or a sorting pile bare, simply accumulates far less corner wear over its life. Corners are damaged by contact, and a sleeve is the cheapest contact barrier there is.
Edges
Edges get evaluated for chipping (small missing flecks of the surface layer along the border) and silvering or whitening (a thin line of exposed core color running along the cut edge). Both are more visible — and more likely to happen — on cards with dark-colored borders, where any lightening along the edge shows up in high contrast against the ink. Light-bordered cards can have the same edge damage; it's just harder to spot, which is exactly why the edge check shouldn't be skipped just because a border is pale.
Check edges the same way you check corners: angled light, loupe in hand, running the full perimeter of the card rather than a quick glance at one side. Rotate the card slowly under a lamp so light rakes across the edge at different angles — chipping and silvering both catch the light differently than an intact edge, and a raking angle will surface defects that look invisible under flat, straight-on light.
Surface
Surface covers everything on the face of the card that isn't centering, corners, or edges: print lines (thin lines left behind by the printing process), scratches, clouding (a hazy patch, sometimes from packaging or a factory defect), and dimples (small surface depressions, sometimes from being pressed against something during storage or shipping).
The technique that works best here is tilting the card under a single point light source — a desk lamp works fine — and rocking it slowly while watching how the light reflects off the surface. Scratches and print lines are often nearly invisible under flat overhead light and become obvious the moment the card is tilted so light rakes across the surface at a low angle instead of hitting it head-on.
One artifact worth knowing by sight: fingerprints. A light fingerprint isn't necessarily permanent damage, but it is a handling mark, and it shows up under angled light the same way a scratch does. If you're seeing fingerprints on cards during pre-screening, that's a signal to switch to gloves or strict edge-only handling going forward, not just a note about that one card.
A home pre-screen setup
You don't need a lab to do this consistently. A workable pre-screen station is:
- A 10x loupe — a standard jeweler's loupe works fine; this doesn't need to be specialized grading equipment.
- A bright, adjustable light you can angle across the card rather than aim straight down at it.
- A clean, flat, non-scratching surface — a soft mat or cloth, not a bare countertop.
- Cards handled only by the edges, never the face, and set down onto the mat rather than slid across it.
Work through centering, corners, edges, and surface in that order for each card, and sort as you go into three piles: send (clean enough across all four criteria to justify the grading fee), maybe (borderline on one criterion — worth a second look or a second opinion before committing), and keep-raw (a visible flaw that will cap the grade below what makes the fee worthwhile). This sorting is the entire point of pre-screening: it turns a flat per-card fee into a fee you're only paying on cards that have a real shot at the grade you need.
From pre-screen to submission
Once a stack is sorted, the send pile moves into the actual submission workflow — declared values, tiering, paperwork, and packing for shipment. That process is covered in detail in preparing a grading submission.
Between pre-screening and packing, store the send pile the same way you'd store any high-value stock: individually in perfect-fit sleeves and toploaders, not loose in a box or a rubber-banded stack. A card that passed pre-screening with sharp corners and clean edges needs to leave your hands in exactly that condition, and the packaging is what keeps a screening result accurate all the way to the grader's desk. The full setup is in building a card protection stack.
Stock up on the tools this workflow depends on: penny sleeves and perfect fits, toploaders, and graded card storage for cards once they come back slabbed. Card shops and high-volume submitters buying by the case can apply for a wholesale account to get case pricing across all three.